
Make the Most of Your Trip
Compare the top tours, passes, and experiences — find what fits your travel style.
Short Excerpt
- Red-eye discomfort usually builds from hours of limited movement, cramped posture, pressure on the hips and lower back, and trying to sleep in a position your body would never choose at home.
- Small, repeated movements such as ankle pumps, heel raises, knee extensions, pelvic tilts, shoulder rolls, and short aisle walks can be more useful than one aggressive stretching session before boarding.
- The strongest plan begins before the airport, continues with brief movement at the gate and during the flight, and finishes with another reset before landing.
Quick Take
- Do a short mobility routine before leaving home or the hotel instead of trying to loosen everything once you are already confined to your airplane seat.
- At the gate, walk when you can and use simple heel raises, toe lifts, shoulder rolls, and gentle hip movements rather than deep stretches in a crowded space.
- During longer flights, move your legs frequently and, when it is safe to do so, stand or walk periodically instead of remaining completely still for several hours.
- In your seat, ankle pumps, ankle circles, knee extensions, pelvic tilts, weight shifts, and shoulder-blade squeezes can reduce the locked-up feeling without disturbing neighboring passengers.
- Seat position matters as much as stretching, so support your lower back, keep your feet supported when possible, avoid sliding forward, and change position occasionally.
- Stretching can improve comfort, but it is not a substitute for medical advice or appropriate blood-clot prevention when you have additional risk factors.
Beat Red-Eye Stiffness With A Stretch And Movement Plan You Can Actually Do In Your Seat
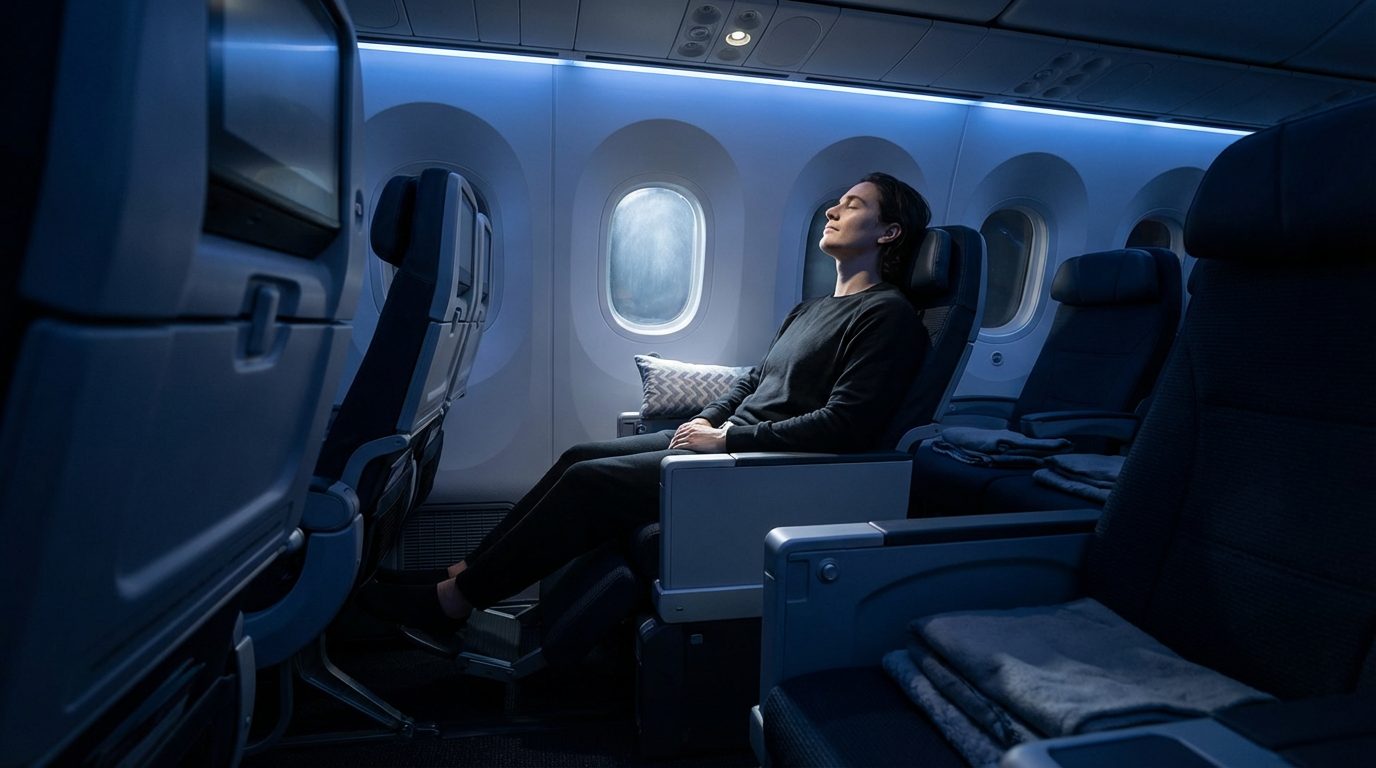
A red-eye can make your body feel as tired as your mind.
Hours of sitting with your hips bent, feet confined, shoulders rounded, and lower back pressed into an airplane seat can leave you dealing with heavy legs, tight hips, neck tension, numbness, or that frustrating feeling that no sleeping position stays comfortable for long.
The mistake is waiting until something already hurts before you move.
Red-eye comfort works better as a series of small resets that begin before the airport and continue throughout the flight instead of one ambitious stretching session followed by several motionless hours.
Start two or three hours before leaving for the airport with a brief mobility routine.
Shoulder circles, a gentle spine movement, supported hip-flexor stretches, a mild hamstring hinge, calf work, and a chest opener can help you board feeling less restricted without turning travel day into a workout.
The airport gives you another opportunity before the seatbelt goes on. Walk around the terminal, stand periodically instead of spending the entire wait in a gate chair, and use discreet movements such as heel raises, toe lifts, shoulder rolls, and controlled hip mobility when space allows.
Once you are airborne, think smaller.
Ankle pumps, ankle circles, knee extensions, gentle pelvic tilts, side-to-side weight shifts, and shoulder-blade squeezes can all be done with very little space and without turning your seat into a stretching studio.
Long periods of immobility matter for more than comfort.
On longer journeys, move your legs frequently and stand or walk periodically when conditions and the seatbelt sign allow.
Travelers with additional blood-clot risk factors should discuss individualized prevention with a healthcare professional rather than relying on stretching alone.
Your seat setup determines how quickly tension returns.
Keep your feet supported when possible, avoid sliding forward onto your tailbone, use a folded sweater or small lumbar support if it improves your position, and bring screens high enough that your neck is not bent downward for hours.
Do not force range simply because a muscle feels tight.
Deep twisting, aggressive hamstring stretching, pulling hard on your neck, bouncing into stretches, or pushing through sharp pain can make an already uncomfortable seat feel worse.
Numbness, tingling, or persistent pain also deserves a different response from ordinary stiffness.
Change position and relieve pressure first, but symptoms that are severe, worsening, or accompanied by unusual one-sided leg swelling, unexplained tenderness, chest pain, difficulty breathing, coughing up blood, or fainting require medical attention rather than another stretch.
The most useful red-eye stretch plan is therefore not about flexibility.
It is about preventing long blocks of stillness, keeping your joints moving comfortably, supporting your posture, and arriving with fewer aches competing for your attention after an already difficult night of travel.
Understand Core Stretch Terms for Confidence and Comfort
Mobility means moving a joint through a comfortable range with control.
Mobility matters on a red-eye because long sitting can make joints feel locked, especially through the hips and upper back.
Blood flow describes circulation that brings oxygen to tissues and helps your legs feel lighter when you have to sit for hours.
Blood flow matters because long sitting can create heaviness, tingling, or restless discomfort that makes it hard to relax.
Tight hip flexors are the front-of-hip muscles that shorten during sitting, then tug on the pelvis when you stand or shift.
That tug can contribute to lower back strain and the “I cannot find a comfortable angle” feeling in the seat.
Static stretching means holding a position for 15 to 45 seconds, which can reduce tension when done gently.
Dynamic stretching means controlled movement through a range, which warms tissues and often feels better before a long sit.
Restore Ease With Simple Mobility Work
Controlled joint movement decreases the rigid, compressed feeling that builds during travel.
It also helps your posture stay neutral longer, which reduces the chance your lower back takes over.
Mobility work should feel smooth and mild, not forced or extreme.
Gentle movement also gives your nervous system a sense of safety and control.
That matters because discomfort and anxiety often feed each other on red-eyes.
A small mobility routine can break that loop before it starts.
Boost Leg Comfort Through Gentle Circulation Work
Circulation is supported by muscle contractions in your calves and thighs.
Those muscles act like a pump when you move your ankles and extend your knees.
Long sitting turns that pump off, so heaviness creeps in quietly.
Keeping the pump active reduces swelling and helps your legs feel less restless.
Less restlessness makes it easier to settle into a sleep attempt.
That is why the best red-eye stretches include small repeated movements, not just long holds.
Sequence Movements for Better Comfort and Control
Dynamic stretching is ideal before boarding because it improves comfort without leaving you feeling unstable.
Static stretching is useful closer to rest because it can reduce tension and signal “we are settling now.”
A light static finish should feel like a release, not a test.
Overstretching can create soreness that makes the seat feel worse.
Gentle holds also reduce the chance of dizziness for older adults.
The best sequence is movement first, then short holds, then stop.
The Time-Based Micro-Schedule: A Checklist From Home To Landing
A red-eye plan works best when you do not rely on memory or motivation.
Fatigue makes people forget to move until discomfort becomes loud.
This micro-schedule turns stretching into a predictable routine you can follow without thinking.
It also prevents the common mistake of doing one big stretch, then sitting for hours without moving again.
Small repeated doses are what keep blood flow active and hips from locking up.
Use these timing cues as anchors, then adjust for your flight length and seat environment.
Two To Three Hours Before Leaving For The Airport
Start with the 8-minute routine in the next section so your hips and calves are already looser before travel begins.
Finish with one short static stretch per side, then stop, because more is not better right before a long sit.
Drink normally and avoid last-minute overdrinking, because repeated bathroom trips can increase stiffness.
Choose shoes that allow ankle movement, because stiff footwear makes ankle pumps less effective.
Wear clothing that does not compress hips, knees, or calves tightly, because compression can increase discomfort for some bodies.
Pack a small lumbar support option, such as a folded sweater, so posture can stay neutral in the seat.
At The Gate: Every 20 To 30 Minutes
Stand up for two minutes even when you feel fine, because prevention is easier than rescue.
Walk a short loop, then do heel raises and toe lifts to wake up the calf pump that supports circulation.
Reset your upper back with shoulder rolls, because gate seats encourage rounded posture and neck tension.
Use the discreet hip mobility loop once before boarding begins so hips do not feel stuck as soon as you sit.
Avoid deep stretching in crowded areas, because awkward positions increase tension rather than reducing it.
Return to your seat with a calm posture rather than slumping, because posture choices start before you board.
After Takeoff: Once The Seatbelt Sign Turns Off
Begin with the in-seat circulation set: ankle pumps, ankle circles, and knee extensions in a quiet, controlled way.
Set a mental cue to repeat a mini set every 60 to 90 minutes, because consistency is what keeps legs comfortable.
Avoid deep hamstring stretching early in the flight, because it can tug on the lower back in a confined space.
Use small pelvic tilts to reduce the locked lower back feeling that shows up after takeoff.
Adjust your feet and seat position so you are not sliding forward, because sliding increases back strain.
Treat the first hour as comfort setup time, because it influences how the rest of the night feels.
Midflight: Every 60 To 90 Minutes
Repeat ankle pumps and knee extensions to keep blood flow active.
Add gentle pelvic tilts to keep the lower back from stiffening into one position.
Stand and walk briefly when safe and when you can do it without rushing.
Use heel raises at the galley if there is space, because it is an efficient circulation boost.
Keep movements small and controlled, because dramatic stretching can draw attention and increase tension.
Notice discomfort early and respond early, because the goal is to prevent pain spikes.
Final Hour Before Landing
Repeat the circulation set to prepare your legs for standing, walking, and luggage handling.
Do a posture reset to reduce neck stiffness before you enter the busy deplaning phase.
Stand slowly and pause before walking, especially for older adults or anyone prone to lightheadedness.
Avoid forcing deep stretches during descent, because you want stability and calm.
Focus on small movements that make the first steps off the plane feel easier.
Treat landing preparation as part of the comfort plan, not an afterthought.
The 8-Minute Pre-Flight Routine: Home Or Hotel Version
This routine is designed for stiff travelers who want relief without soreness.
It uses dynamic movements first to wake up joints and circulation.
It ends with short, gentle holds that reduce tension and support relaxation.
Move slowly and breathe normally, because breath-holding increases muscular guarding.
Stop any movement that causes sharp pain, numbness, or tingling, because those signals require caution.
This routine is brief on purpose, because consistency matters more than intensity before a long sit.
Step 1: Shoulder And Upper Back Wake-Up
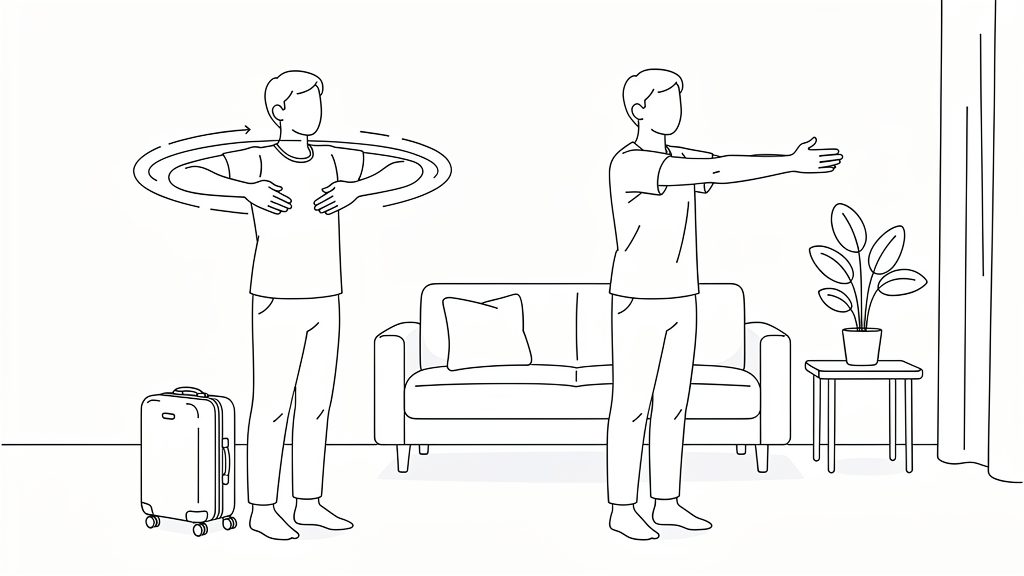
Do five slow shoulder circles forward and feel your shoulders drop away from your ears.
Do five slow shoulder circles backward and imagine widening your collarbones as you move.
Clasp your hands in front and reach forward gently for 10 seconds to open the upper back.
Release and stand tall with your chin level rather than lifted.
Add three slow breaths while maintaining that neutral head position.
This step reduces the travel “armor” tension that builds when you are rushing.
Step 2: Standing Spine Wave
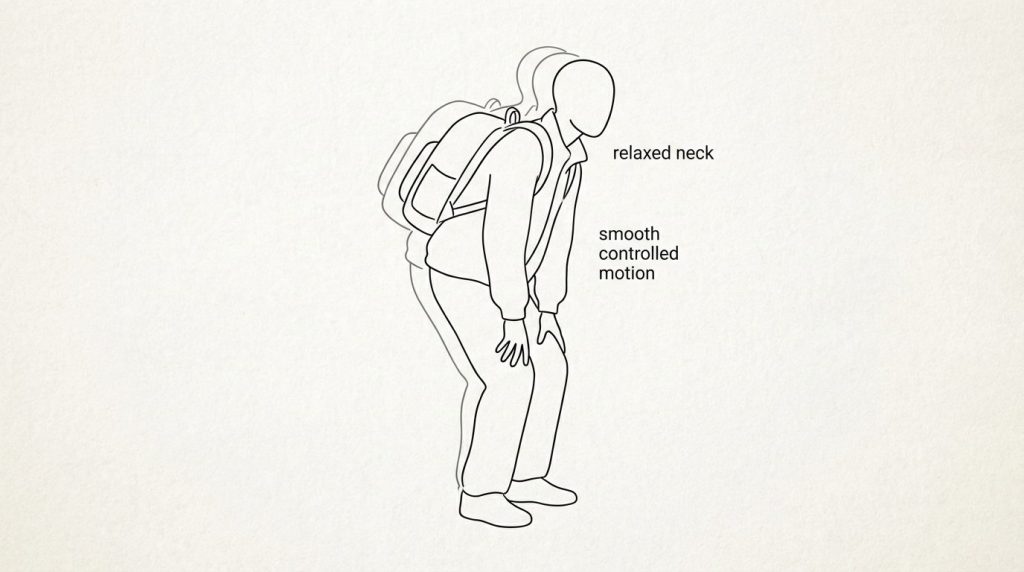
Place hands on your thighs and soften your knees.
Round your upper back slightly as you exhale without collapsing into the lower back.
Gently extend your chest as you inhale, keeping the movement smooth and small.
Repeat five slow cycles and keep your neck relaxed.
Notice whether your ribs flare, then soften them down to keep the movement controlled.
This step helps your spine feel less rigid before you sit for hours.
Step 3: Supported Hip Flexor Opener
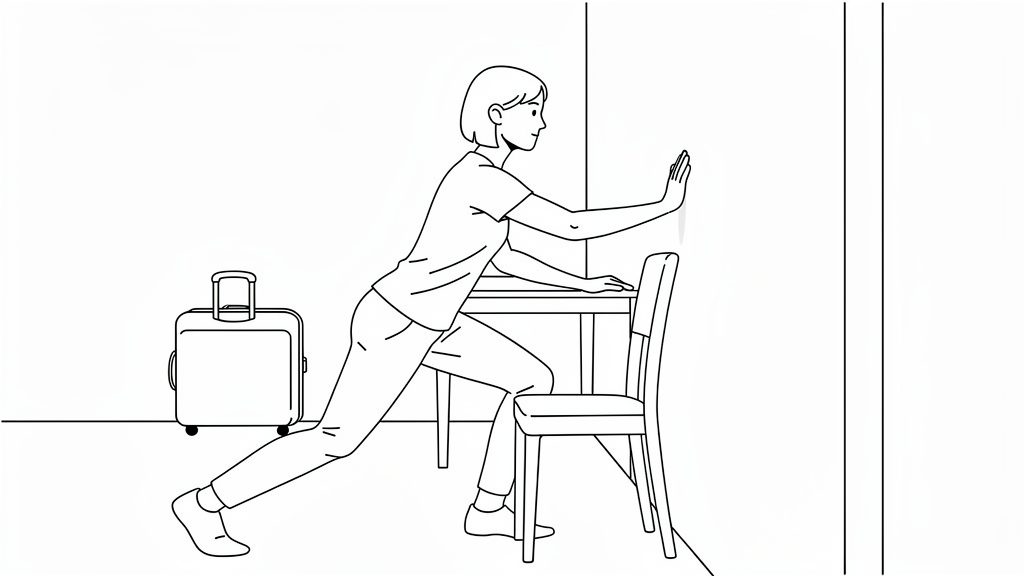
Hold a wall or chair for balance so the stretch feels safe and stable.
Step one foot back into a short lunge stance and keep your torso tall.
Gently tuck your pelvis under slightly until you feel mild tension in the front of the back hip.
Hold 20 to 30 seconds, then switch sides without rushing.
Repeat once per side when hips feel tight, because this area drives a lot of back discomfort in seats.
End by standing tall for a breath so your body resets before the next move.
Step 4: Hamstring Hinge Reset
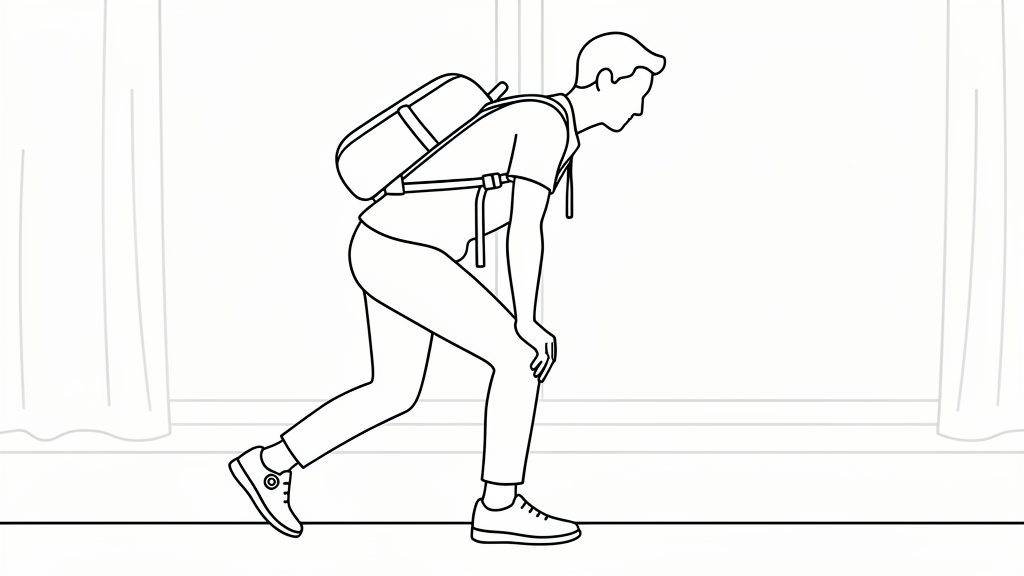
Place one heel slightly forward and keep a soft bend in the knee.
Hinge at the hips with a long spine until you feel mild tension behind the thigh.
Hold 15 to 20 seconds and avoid rounding your back to chase range.
Switch sides and keep the movement calm and controlled.
Repeat once more per side only when you feel notably tight.
This hinge reduces the “pulled” feeling behind the legs that shows up after long sitting.
Step 5: Calf And Ankle Pump Primer
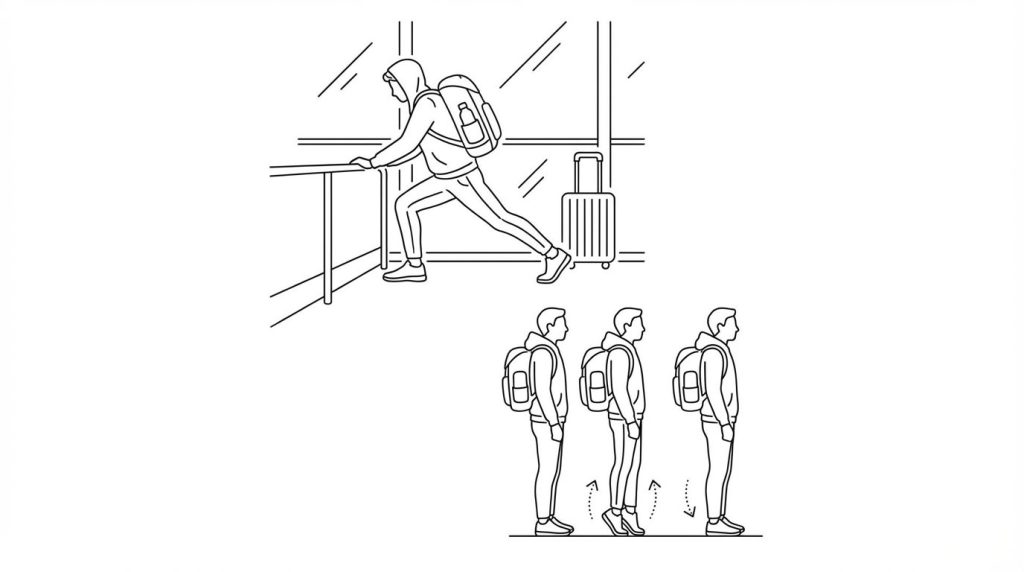
Step one foot back with the heel down and the knee straight for a calf stretch.
Hold 20 seconds, then bend the back knee slightly to shift sensation lower.
Switch sides and keep the stretch mild, not intense.
Finish with 10 heel raises, slow up and slow down, to activate circulation.
Notice how your feet feel more awake after this step.
This step supports blood flow and reduces leg heaviness on long sits.
Step 6: Chest Opener
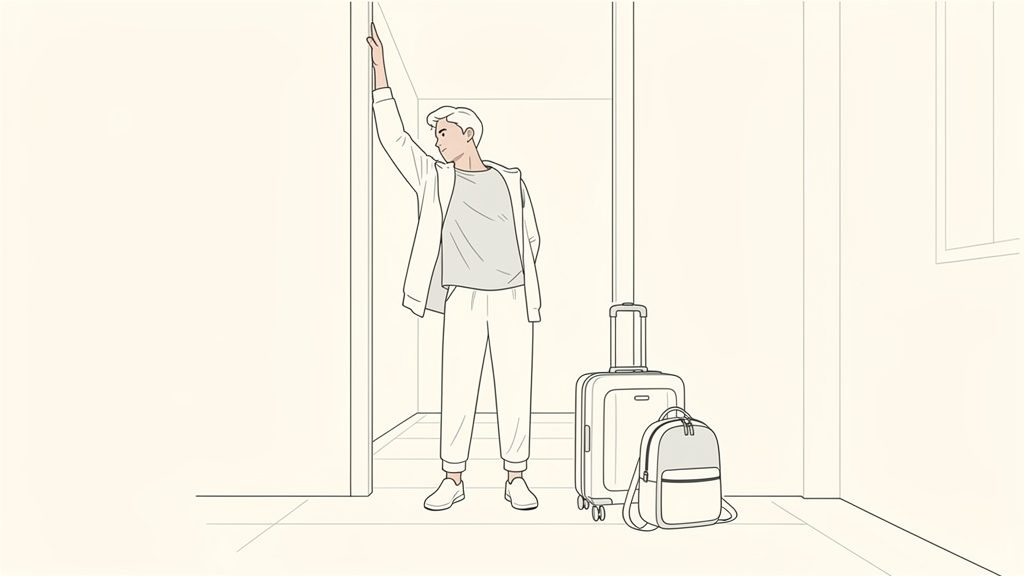
Place your forearm on a doorway or wall edge.
Rotate your torso away gently until you feel a mild stretch across the chest.
Hold 20 seconds per side and keep shoulders down.
Avoid shrugging, because shrugging increases neck tension.
Take two slow breaths per side to encourage release.
This step supports better posture and easier breathing in the seat.
Step 7: Gentle Static Finish
Do a light neck side bend for 15 seconds per side without pulling your head.
Keep the stretch mild and imagine space between your ear and shoulder.
Do a seated figure-four only when it feels comfortable and stable.
Hold 15 seconds per side and stop before it becomes intense.
End with one slow exhale, because that signals settling.
This finish supports relaxation without creating soreness.
Stay Comfortable at the Gate with Subtle, Effective Stretches
Airports are crowded, so the best stretches are subtle and repeatable.
These movements focus on circulation and hip mobility, because those are the biggest red-eye pain triggers.
They also reduce the stiff feeling that builds from standing in lines and sitting at gates.
Older adults often benefit because movement breaks reduce that “first steps are awkward” sensation.
Travelers with back discomfort benefit because posture resets reduce strain before a long sit.
Use these as quiet maintenance rather than a full workout.
The Two-Minute Walk Loop
Walk at a comfortable pace for two minutes to warm circulation.
Stop and do 10 heel raises to activate calf muscles.
Do 10 toe lifts with heels down to balance ankle motion.
Repeat once when you have time, because repetition is what changes comfort.
Return to your seat and sit tall rather than collapsing.
This loop is safe, discreet, and highly effective for leg comfort.
The Controlled Hip Mobility Loop
Hold a chair back or stable surface to keep the movement controlled.
Swing one leg forward and back in a small range 10 times.
Swing the same leg side to side in a small range 10 times.
Switch sides and keep your torso tall.
Avoid large swings, because control is what keeps it safe in public spaces.
This loop reduces hip stiffness without needing floor space.
The Upper Back And Neck Reset
Reach both arms forward and widen your upper back for 10 seconds.
Roll shoulders up, back, and down five times slowly.
Turn your head left and right, pausing briefly at a comfortable range.
Add a gentle chin tuck, as if making a double chin, for two seconds and release.
Repeat the chin tuck five times to reduce phone-neck posture.
This reset prepares your neck and shoulders for a more tolerable seat posture.
In-Seat Stretches: Maintenance That Keeps You Comfortable Quietly
Seat-friendly movements should be small, controlled, and respectful of neighbors.
The priorities are ankles, calves, hips, and posture, because those are the most common red-eye trouble zones.
Small movements repeated regularly are more effective than one dramatic stretch.
These sets are designed to take two minutes or less.
Use them at the timing cues in the micro-schedule.
Treat them as maintenance, the same way brushing teeth is maintenance.
In-Seat Set A: Circulation Core
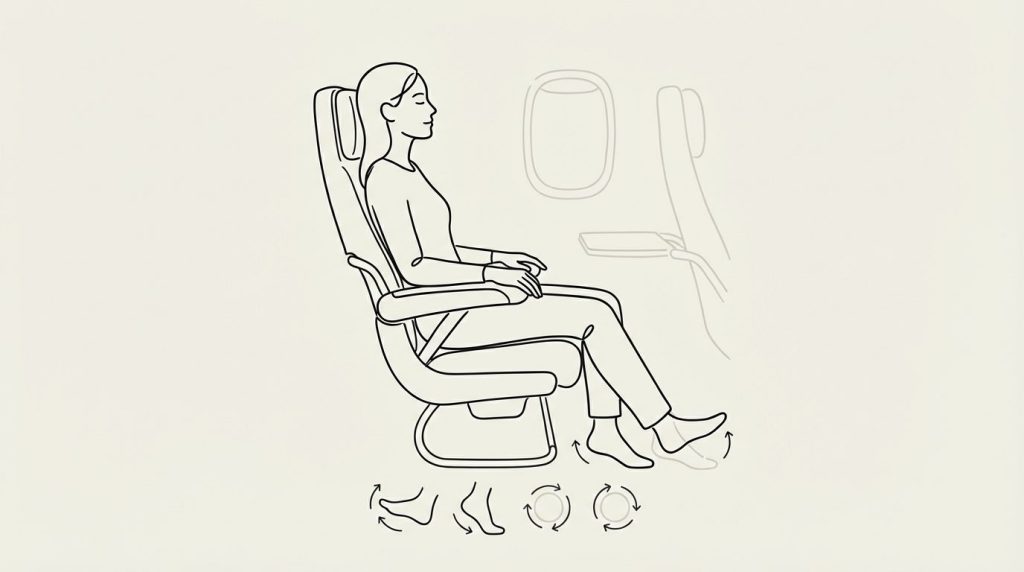
Do 15 toe lifts and 15 toe presses slowly.
Do 10 heel lifts and 10 heel lowers.
Do ankle circles five each direction per foot.
Keep your breathing steady, because tension tends to show up when you hold your breath.
Notice whether your legs feel lighter after this set.
This set supports the calf pump that keeps circulation moving during long sitting.
In-Seat Set B: Knee and Thigh Activation
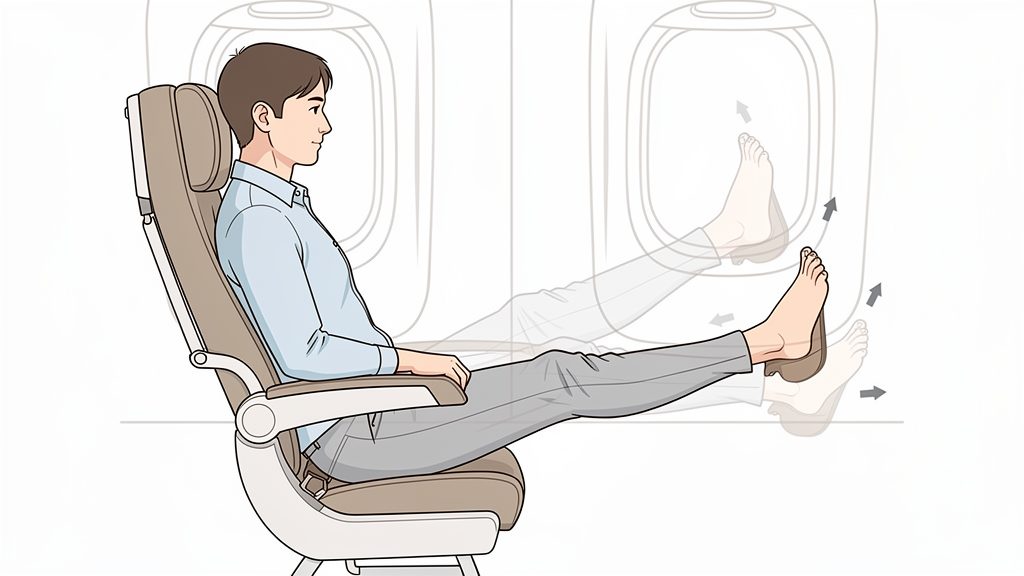
Extend one leg until it is straight and gently flex the foot toward you.
Hold two seconds and lower slowly.
Repeat 10 times per side and keep the movement small.
Avoid locking the knee aggressively, because comfort is the goal.
This set increases blood flow and reduces stiffness behind the knees.
It also helps many travelers who feel restless legs at night.
In-Seat Set C: Pelvis and Lower Back Ease
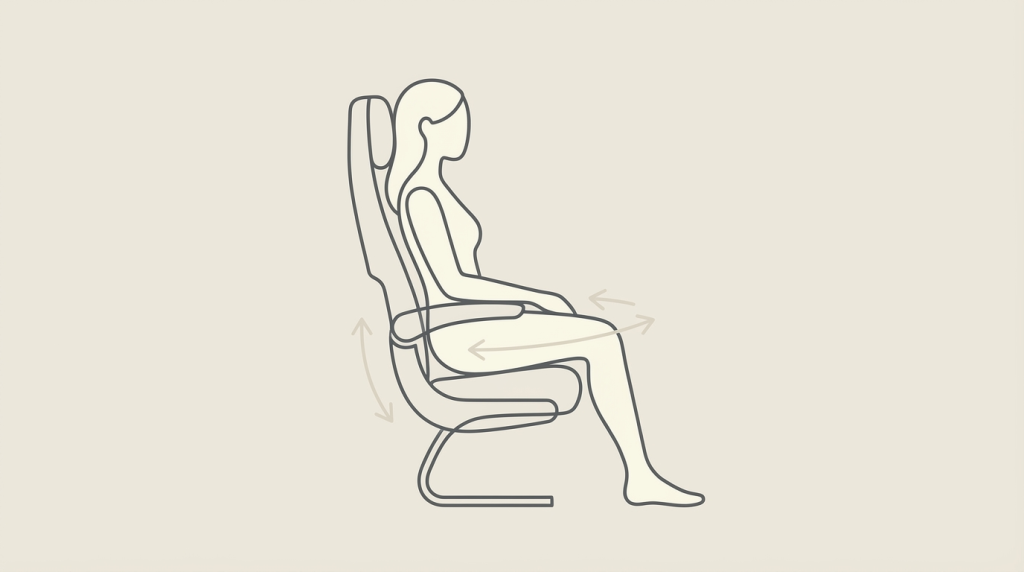
Sit tall and shift weight gently left to right 10 times.
Do small pelvic tilts forward and back 10 times.
Keep the motion subtle and smooth, not exaggerated.
Imagine your pelvis finding a neutral position rather than forcing a curve.
This set reduces the locked lower back feeling that builds during long sitting.
It also reduces glute numbness by changing pressure points.
In-Seat Set D: Chest and Shoulder Release
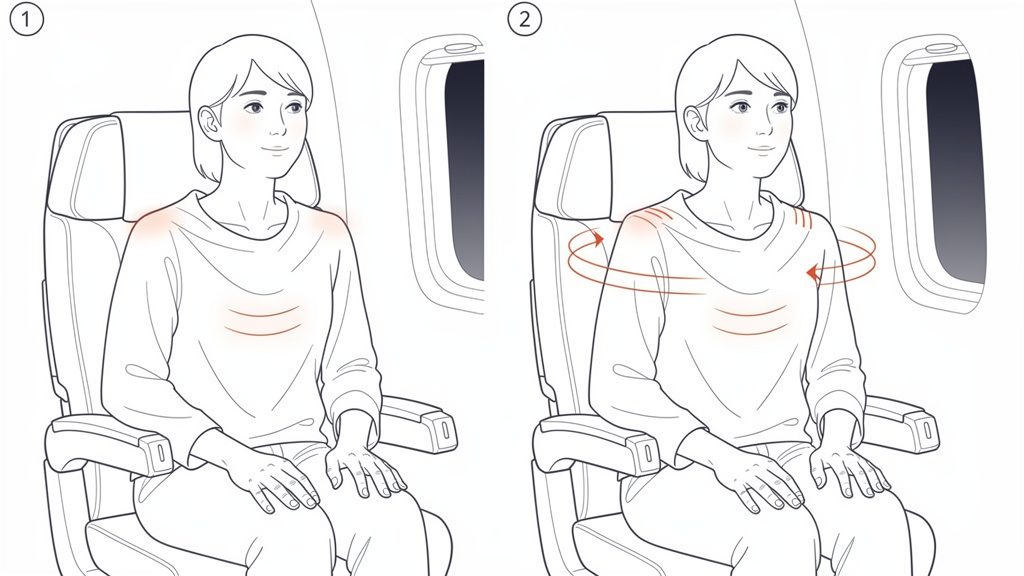
Squeeze shoulder blades together for three seconds and release.
Repeat five times and keep shoulders down.
Roll shoulders up, back, and down five times slowly.
Take one slow breath with each roll to reduce tension.
This set counters rounded posture and reduces neck strain.
Better posture often makes rest feel more possible in a cramped seat.
Seat Setup Cues: Make The Stretch Benefits Last Longer
A good stretch routine can be erased by a poor seat position quickly.
Seat setup is the bridge between stretching and comfort.
Small adjustments reduce the speed at which tension returns.
These cues matter even more for older adults and travelers with back discomfort.
Aim for supported neutral, not rigid “perfect posture.”
Reset your setup after meals, screens, and long periods of stillness.
Feet And Legs Setup
Plant both feet when possible, even if that means sliding them slightly back.
Avoid dangling feet, because that pulls on hamstrings and increases back strain.
Keep knees roughly level with hips or slightly lower when you can.
Avoid crossing legs for long periods, because it creates asymmetry in hips and pelvis.
Change foot position occasionally, because static positions create pressure points.
Comfort comes from micro-movement, not from holding one position all night.
Pelvis And Lower Back Setup
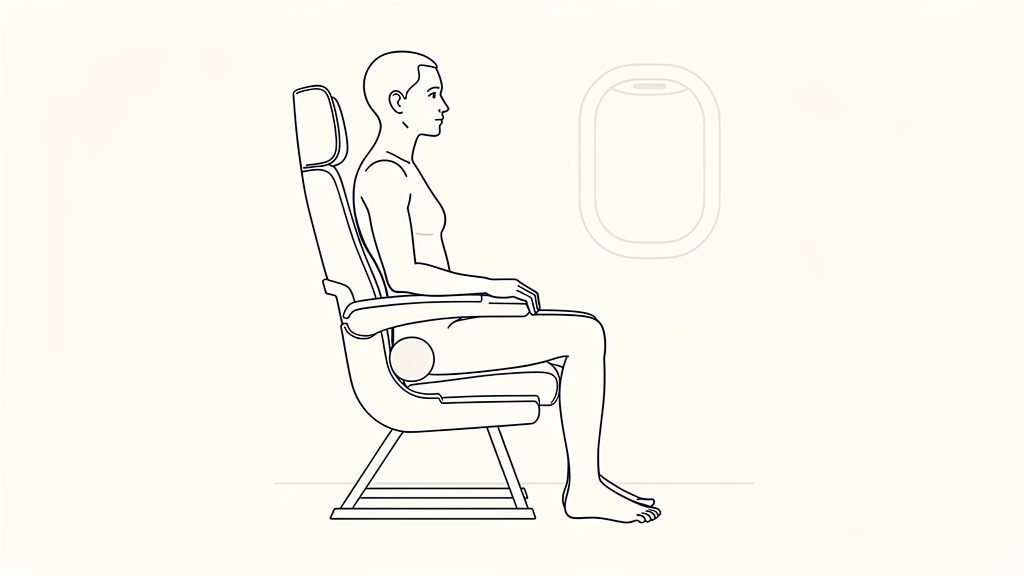
Sit on your sit bones rather than slumping onto your tailbone.
Use a small lumbar support, even a folded sweater, to fill the low-back curve.
Avoid sliding forward, because that increases lumbar rounding and neck strain.
Adjust recline slightly when possible, because a tiny change can reduce back pressure.
Reset pelvis position with a few pelvic tilts after you settle in.
A supported pelvis is often the difference between mild discomfort and constant discomfort.
Upper Back, Neck, And Arm Setup
Drop shoulders away from ears and let arms rest so shoulders do not float.
Bring screens higher so your neck is not bent forward for long stretches.
Use head support that meets your neck gently rather than pushing your head forward.
Adjust headrest wings to reduce side-to-side strain if your seat offers them.
Do a shoulder roll sequence after long screen use, because screens quietly create neck tension.
A calmer neck often leads to a calmer sleep attempt.
Two Specialized Routines By Constraint: Choose Your Best Fit
Different bodies need different emphases on a red-eye.
These branches reduce decision fatigue and prevent you from doing unnecessary moves.
Pick one branch and follow it rather than mixing everything.
The older adult branch focuses on stability, safety, and gentle circulation.
The tight hips and restless legs branch focuses on hips, calves, and repeatable movement.
Both branches work best when paired with seat setup cues.
Routine 1: Older Adults And Back Or Balance Concerns
Use support for every standing movement so you feel stable.
Keep ranges small and avoid anything that makes you feel dizzy.
Prioritize shoulders, hips, calves, and gentle chest opening, because these areas influence posture the most.
At home, do shoulder circles, supported hip flexor opener, calf stretch, and a mild chest opener.
At the airport, do the walk loop and heel raises frequently rather than doing deep stretches.
In-seat, rely on ankle pumps, knee extensions, pelvic tilts, and shoulder blade squeezes.
Stand slowly and pause before walking, because sudden transitions can cause lightheadedness.
Routine 2: Tight Hips, Restless Legs, And Lower-Leg Heaviness
Prioritize hip flexor opening and calf activation, because those reduce the locked-seat feeling quickly.
At home, do supported hip flexor opener, hamstring hinge, calf stretch, and heel raises.
At the airport, do the walk loop twice, then do the hip mobility loop once.
In-seat, do ankle pumps, ankle circles, and knee extensions every 60 to 90 minutes.
Take short aisle walks when safe, because walking is the strongest circulation tool.
Avoid long stillness blocks, because restless discomfort builds when the calf pump stays off.
Use seat setup cues aggressively, because hips relax faster when pelvis is supported.
Prevent Pain Spikes by Fixing Common Stretch Errors
Some stretches and habits sound helpful but create problems in cramped spaces.
Avoiding these is part of being “most complete,” because prevention is the real skill.
Do not stretch aggressively into pain, because soreness makes the seat feel worse.
Do not do deep twisting in a tight seat, because it can irritate sensitive backs.
Do not yank your neck with your hand, because it can strain tissues and trigger headaches.
Do not do intense hamstring stretching with a rounded back, because it can pull on the lower back.
Do not bounce aggressively, because fast bouncing can irritate muscles and tendons.
Do not sit for hours without ankle movement, because leg heaviness builds quietly.
Do not wait until pain is severe to move, because small early movements work better.
Troubleshooting: Fast Fixes For Midflight Problems
A red-eye plan should include fixes for the moments that typically ruin comfort.
These quick protocols are designed to work in a seat without attention.
They also follow the rule that safety matters more than pushing through.
Use the smallest effective change first, then escalate to standing when safe.
Stop and seek help when symptoms are intense, persistent, or worsening.
Problem: Lower Back Tightens After Takeoff
Do 10 pelvic tilts slowly and notice whether the tension decreases.
Shift weight left to right 10 times to change pressure points.
Add lumbar support with a folded sweater to support your natural curve.
Plant feet and avoid sliding forward, because sliding increases rounding.
Stand and walk briefly when safe, because movement often resets the back quickly.
Repeat the pelvic set after you sit again to lock in comfort.
Problem: Leg Cramps Start Or Calves Feel Hard
Do ankle pumps for 30 seconds per side to activate the calf pump.
Do gentle knee extensions 10 per side to increase blood flow.
Stand and do 10 heel raises when safe, because standing changes the mechanics.
Sip water in small amounts when you have been dry, then return to maintenance.
Avoid forceful stretching into a cramp, because it can worsen the spasm.
Repeat a smaller set every 30 minutes until the sensation quiets down.
Problem: Pins-And-Needles Or Numbness Appears
Change position immediately and uncross legs if crossed.
Plant feet and do ankle circles and knee extensions slowly.
Stand when safe and walk briefly, because pressure relief often resolves numbness.
Check that clothing is not tight at the waist or behind the knee.
Seek help from cabin crew if symptoms are persistent, worsening, or accompanied by significant pain.
Treat numbness as a signal to adjust support rather than a signal to ignore.
Problem: Neck Stiffness Makes Rest Impossible
Do shoulder rolls slowly five times and let your shoulders drop.
Squeeze shoulder blades together five times to counter rounded posture.
Turn head gently left and right without pushing end range.
Adjust head support so it meets your neck rather than pushing your head forward.
Raise your phone higher to reduce sustained downward neck angle.
Repeat a posture reset after any long screen session to prevent relapse.
Finish Your Flight Feeling Looser and More Stable
Stretching before a red-eye works when it is gentle, consistent, and built around circulation.
A short pre-flight routine prepares hips, calves, chest, and upper back for long sitting.
Airport movement breaks reduce stiffness before boarding, especially when you repeat them.
In-seat mini sets keep blood flow active without disturbing anyone.
Seat setup cues make the stretch benefits last longer and reduce relapse.
Troubleshooting steps handle common midflight problems fast so discomfort does not dominate the night.
FAQ – Which Stretches and Movements Actually Help During a Long Red-Eye Flight?
What Should You Stretch Before Leaving for a Red-Eye Flight?
Focus on the areas that spend the longest time compressed or rounded once you sit down.
A short routine can include shoulder circles, gentle spinal movement, a supported hip-flexor stretch, a mild hamstring hinge, calf stretches, heel raises, and a chest opener.
Keep the movements controlled and comfortable rather than trying to increase flexibility immediately before several hours of sitting.
Eight minutes of useful mobility is generally more practical than a long workout that leaves you tired or sore before departure.How Often Should You Move During a Long Overnight Flight?
Do small leg movements frequently while seated and stand or walk periodically when it is safe.
For long-distance travel, getting up approximately every one to two hours provides a useful practical target when cabin conditions and the seatbelt sign allow it.
You can use ankle pumps, toe lifts, heel raises, or leg-muscle contractions between those walking opportunities.
The goal is to avoid spending the entire overnight flight completely motionless.Which In-Seat Moves Are Best for Heavy or Restless Legs?
Start with your ankles and calves because they are easy to move without taking up much space.
Raise and lower your toes, lift your heels, perform slow ankle circles, and gently straighten one leg at a time when there is enough room.
You can also tighten and release the thigh and calf muscles periodically.
Small repeated contractions are usually more practical in an airplane seat than trying to perform a large stretch.What Helps When Your Lower Back Tightens After Takeoff?
Change position before trying to stretch harder.
Plant your feet when possible, stop sliding forward in the seat, add a small amount of lumbar support, and perform gentle pelvic tilts or side-to-side weight shifts.
A brief aisle walk can also help once movement is permitted.
Lower-back discomfort often returns quickly when the seat position that created it remains unchanged.How Should You Set Up Your Airplane Seat to Reduce Stiffness?
Aim for a supported position that you can change periodically rather than one supposedly perfect posture.
Keep your feet supported when possible, let your pelvis rest in a comfortable neutral position, and use a folded sweater behind the lower back if that improves support.
Adjust the headrest so it supports rather than pushes your head forward, and bring screens higher instead of looking down for hours.
Even a good setup should be reset occasionally because remaining completely still can become uncomfortable in any position.Are Deep Stretches Better Than Small Movements On A Plane?
Usually not.
Deep stretches are difficult to perform safely in a cramped cabin and can irritate already sensitive muscles or backs when you force the movement.
Small ankle, knee, hip, pelvis, shoulder, and neck movements are easier to repeat and less likely to invade another passenger’s space.
Save larger stretches for the terminal, hotel, or another location where you have room and stable support.What Should Older Travelers or People with Balance Concerns Do Differently?
Use support whenever you perform standing movements and keep the range comfortable.
Walking, ankle pumps, knee extensions, heel raises while holding something stable, shoulder rolls, and gentle pelvic movements can provide useful mobility without requiring complicated positions.
Stand up gradually if you are prone to lightheadedness.
Anyone with significant balance limitations, recent surgery, mobility restrictions, or another medical concern should get individualized guidance before relying on a general flight routine.Can Stretching Prevent Blood Clots on a Long Flight?
Stretching alone should not be treated as a guarantee against blood clots.
Long periods of immobility are one travel-related risk, which is why frequent leg movement, calf-muscle activity, and periodic walking are sensible during longer journeys.
Individual risk rises when additional factors such as a previous clot, recent surgery, pregnancy, certain hormone use, cancer, limited mobility, or specific medical conditions are present.
If you have elevated risk, discuss prevention strategies such as appropriately fitted compression stockings or other measures with a healthcare professional before traveling.When Is Numbness or Leg Discomfort More Than Ordinary Flight Stiffness?
Brief pins-and-needles can happen when you stay in one position and put pressure on a nerve or area of the leg.
Changing position and relieving the pressure may resolve ordinary positional symptoms.
Unexplained one-sided swelling, persistent pain or tenderness, unusual warmth, or skin discoloration can be signs of a blood clot and deserve prompt medical evaluation.
Difficulty breathing, chest pain, coughing up blood, a rapid or irregular heartbeat, lightheadedness, or fainting requires urgent medical attention.What Is the Simplest Stretch Schedule from Home to Landing?
Begin with a short mobility routine a few hours before leaving, then walk and make small posture resets while waiting at the airport.
After takeoff, use ankle and leg movements in your seat and periodically stand or walk when it is safe and permitted.
Repeat a few quiet movements during the flight rather than waiting until stiffness becomes severe, then do another leg and posture reset before landing.
The best routine is not the most complicated one; it is the one simple enough that you actually repeat it throughout the journey.